
Plan
01 · Context
Decision context
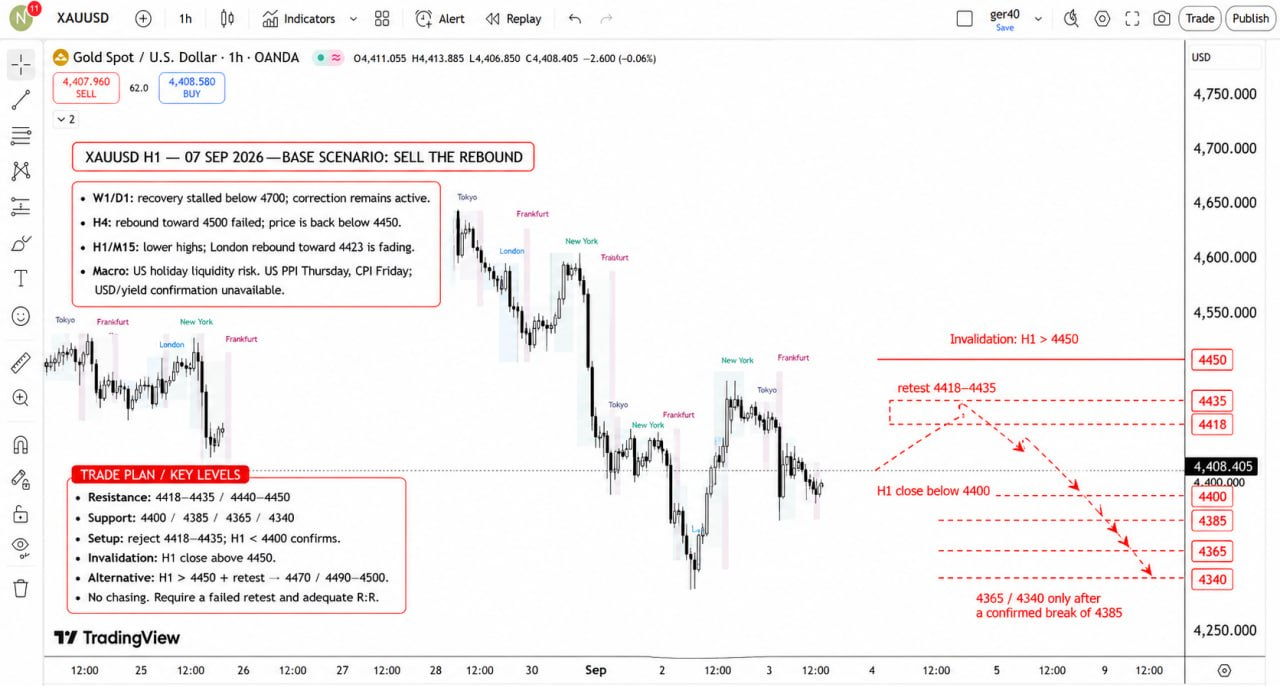
On higher timeframes, the recovery remained below 4 700. On H4, price returned below 4 450.
H1 plan: wait for rejection in the 4 418–4 435 area and downside confirmation below 4 400.
Further reference levels are 4 385, 4 365 and 4 340. An H1 close above 4 450 required a review.
02 · Original version
Original chart and levels
 Expand chart
Research scenario · For independent analysis · Not personal investment advice
03 · Conditions
Downside after a return
Rejection in 4 418–4 435, an H1 close below 4 400 and a failed return above the level.
The next reference levels are 4 385, 4 365 and 4 340. Progression to the last two targets required a confirmed break of 4 385.
An H1 close above 4 450 invalidates the downside scenario.
Alternative scenario in the original plan
Recovery above 4 450
An H1 close above 4 450 and a hold on the retest.
The original plan's recovery reference levels are 4 470 and 4 490–4 500.
A return below 4 450 requires the scenario to be reassessed.
Result
04 · Review of 13 Sep
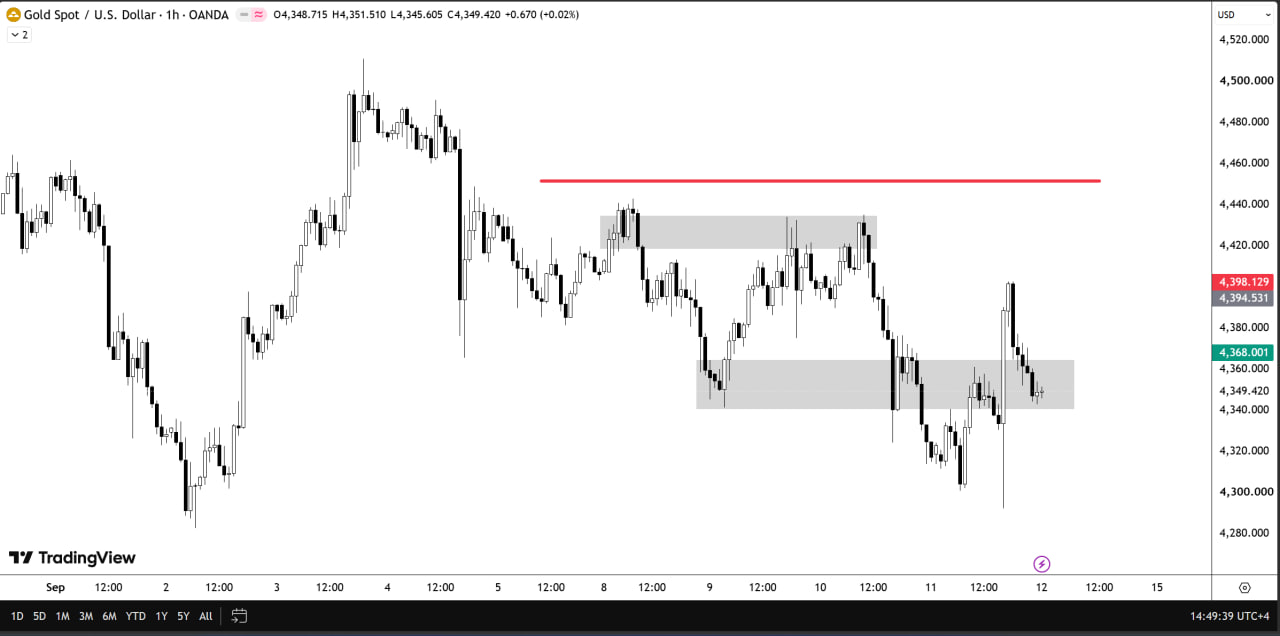
All downside targets were reached
Price returned to 4 418–4 435 and then passed all planned lower levels down to 4 340. The outcome chart also shows the subsequent bounce and another decline.
 Expand chart
Research scenario · For independent analysis · Not personal investment advice
- The 4 418–4 435 return area was visited.
- Price passed 4 400, 4 385, 4 365 and 4 340.
- After reaching the targets, price continued below 4 340; the market then returned to the lower area.
Limits of the conclusion
- Target achievement here is assessed from the H1 chart. Trade results depend on entry, exit and execution.
Plan and outcome together: a return to the area, decline to targets and subsequent movement.